Archive | Windows Phone EN

Add account for e-mails, contacts and calendar in Windows Phone [PRO]

This guide shows you how to add an account to manage e-mail, contacts and calendar on an Windows Phone.

This requires Work2Go Pro

If you don’t have Pro today, you can upgrade by contacting our support.
Not interested of upgrading? Follow the guide Add e-mail account in… instead.

  1. exchange_win8
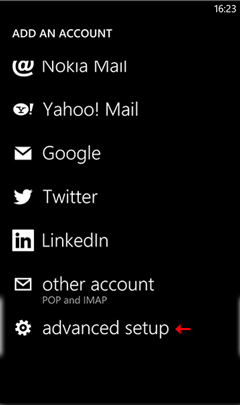
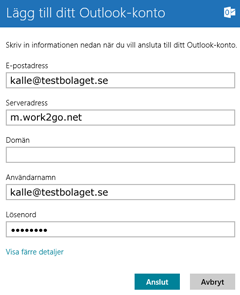
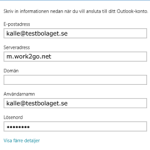
Click settings > E-mail > Add account > Outlook.
  2. Fill in your e-mail address.
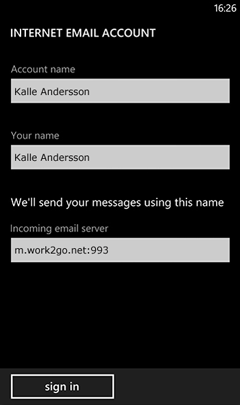
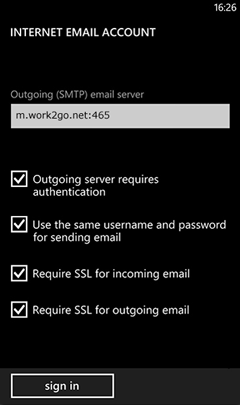
  3. Server address: m.work2go.net
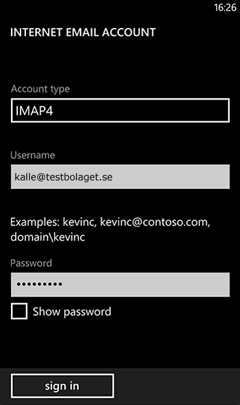
    Domain – Leave this box empty!
  4. User name: your e-mail address (e-mail address that you use when you log into your account in a browser).
  5. Password: your password.
  6. Click connect.

Click image for full version.

If it doesn’t work

  • Test your username and password on www.work2go.net.
  • Check all the settings in your phone again.
  • Are you unsure if you have Work2Go Pro or not? Contact our support.

Can’t send or receive e-mails in Windows Phone

Got an error message when setting up an IMAP account in your Windows Phone? Then you need to check the settings.

1. Are you using the correct username and password?

Test your username and password by signing in on: https://www.work2go.net/

2. Control all settings in your mobile

On the home screen, click the three dots (…) > Settings > Email + accounts > Account.

  • Type in your password again.
  • Server for incoming mail: m.work2go.net:993
  • Do you use IMAP4 account type? – If not, change it.
  • Outgoing mail (SMTP): m.work2go.net:465
  • The server requires authentication should be selected.
  • Use the same username and password for sending should be selected.
  • Use SSL for incoming e-mail should be selected.
  • Use SSL for outgoing e-mail should be selected.


If it still doesn’t work

Change to security type None, for both incoming and outgoing server.
Preferences > Your account > Server settings

Incoming server settings > Security type: None > Server port: 143.
Outgoing server settings > Security type: None > Server port: 2525.

Add an e-mail account to Windows Phone

This guide shows you how to add an account for reading and sending e-mails in an Windows Phone. Do you already know how to do this? Click on the box below for the account settings.

1. Create the account

win_mob_IMAP_2g

  1. Go to Preferences > Mail > Add Account > Advanced.
  2. Enter your e-mail address and password and press Next.
  3. Press Internet e-mail.

Click image for full version.

win_mob_IMAP_5d2. Add your account settings

  1. Name of your account (only visible to you).
  2. Enter the name you want e-mails to be sent from.
  3. Server for incoming e-mails: m.work2go.net:993

Click image for full version.

win_mob_IMAP_6c3. Select the account type IMAP

  1. Fill in the account IMAP4.
  2. Username: your e-mail address (e-mail address that you use when you log into your account in a browser).
  3. Password: password.

Click image for full version.

4. Adjust the settings

win_mob_IMAP_7b

  1. Outgoing e-mail (SMTP): m.work2go.net:465
  2. Place a check by My server requires authentication.
  3. Use the same username and password to send.
  4. Use SSL for incoming e-mail.
  5. Use SSL for outgoing e-mail.
  6. Log into your account.

Click image for full version.

If it doesn’t work

Test your username and password on www.work2go.net and check all the settings in your phone again. Read more in Can not send or receive e-mails