Archive | E-mail program

Setting up account in MS Mail app [Pro]

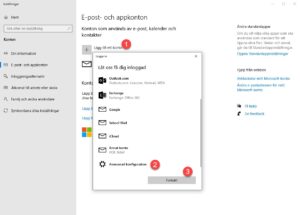
Select Exchange ActiveSync

Go to Email and app accounts

Add an account (1)
Select Advanced configuration (2)
Continue (3)


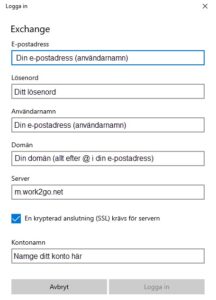
In the next popup, enter:

Your email address (username)
Your password
Your email address (username) again
Domain (everything after @ in your email address)
Server: m.work2go.net
As well as naming your account
Then click on Log in. Done!

Sync contacts on Mac

Follow the steps below to sync your contacts from Work2Go to the Contacts app on your Mac.

1. Open the Contacts app.

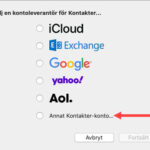
2. Click on Contacts at the top left and select Add Account…


3. Select Other Contacts Account…


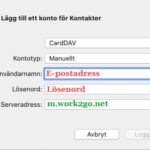
4. Fill in the information below.
Account Type: Manual
Username: Enter your email address
Password: Enter password
Server address: m.work2go.net


5. Click Sign in > Done.

All contacts are now syncing, this will take a few minutes.

Sync Calendar on Mac

Follow the steps below to sync your calendar from Work2Go to the Contacts app on your Mac.

1. Open the Calendar app.

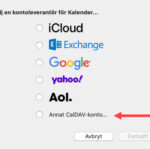
2. Click on Contacts at the top left and select Add Account…

3. Select Other CalDAV Account…


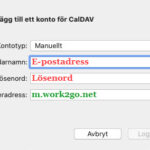
4. Fill in the information below.
Account Type: Manual
Username: Enter your email address
Password: Enter password


5. Click Sign in > Done.

The calendar is now synchronizing, this will take a few minutes.

Save Sent and Trash on the server

Once you have your e-mails in Mac Mail, it is wise to connect the program’s Sent and Trash folders with those on the mail server. Here we tell you how.

By default, no messages that you send or delete in Mac Mail are saved on the server, this means that messages you send, for example, does not appear on your other devices attached to your e-mail account or when you log in to your account in Work2Go. Follow the steps below so that your messages will be saved on the server instead of locally in Mail on your Mac.

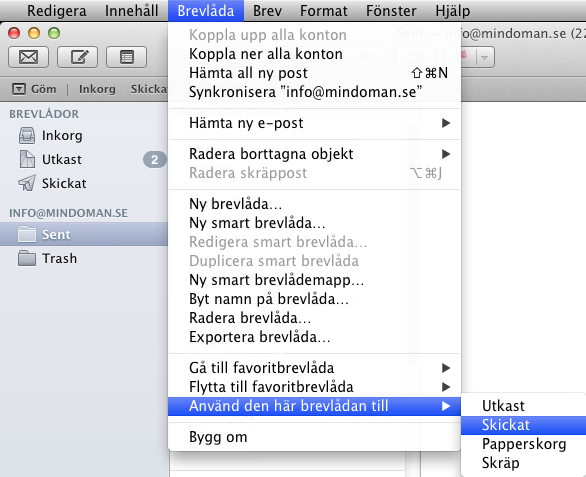
MacMail_mappar

  1. Select the Sent folder under your account in the left column and click the menu Mailbox > Use This Mailbox for > Sent.
  2. Mark Trash folder > click menu Mailbox > Use This Mailbox to > Trash.
  3. Restart the program.

Create log file if problems occur with sync in Outlook [PRO]

If synchronization is not working correctly or if you get an error message when you have Outlook Connector installed, we want you to activate the tool ZCO logging.

This reqires Work2Go Pro + Outlook Connector

If you don’t have Pro today, you can upgrade by contacting our support.
If you haven’t installed the Outlook Connector yet, follow the guide Synchronizing with Outlook [PRO]
This tool (ZCOLogCtl.exe) is installed together with the Outlook Connector.
You find it here: C: \ Program Files \ Common Files \ System \ MSMAPI

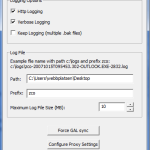
zco_log1. Double-click the file and enter the following information.

Enable: Enable Logging, HTTP Logging, Verbose Logging
Path: select a location where the log files will be saved
Prefix: ZCO
Maximum Log File Size (MB): 10
Click OK to activate the tool.

Click image for full version.

2. Restart Outlook and recreate your problem.
3. Go back to ZCO logging tool and uncheck the Enable Logging.
4. Restart Outlook again.
5. Pack the log files and send them to us for analysis.

Manual update of the Outlook Connector [PRO]

Once you have installed the Outlook Connector version number 7.x, you can update to a newer version of the program.

This requires Work2Go Pro + Outlook Connector

If you don’t have Pro today, you can upgrade by contacting our support.
If you haven’t installed the Outlook Connector yet, follow the guide Synchronizing with Outlook [PRO]
ZCO-Outlook-2010-w2g


ZconnectorOutlook 2010/2013

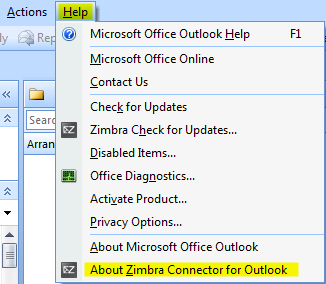
Go to the Zimbra > Check for updates (top right corner).
If there is a new version to update you can do so by clicking Upgrade in the popup window.

Outlook 2007

Go to Help > Check for updates. If there is a new version to update you can do so by clicking Upgrade.


Import an address book to Thunderbird

You can move your contacts in Work2Go to your account in Thunderbird through the following steps.

Export Address Book from Work2Go

  1. Settings > Import / Export > Export
  2. Type: Contacts and select the Thunderbird contacts in the drop down list
  3. Source: select your address.
  4. Click Export

Import it into Thunderbird

  1. Tools > Import
  2. Select that you want to import address books> Next
  3. Select the import option Text file (LDIF, .tab, .csv, .txt)> Next
  4. Find the file and select which fields you want to import.
  5. Click OK > Finish


See your account size in Outlook [PRO]

This reqires Work2Go Pro + Outlook Connector

If you don’t have Pro today, you can upgrade by contacting our support.
If you haven’t installed the Outlook Connector yet, follow the guide Synchronizing with Outlook [PRO]
If you have installed the Outlook Connector and want to see how much disk space you use on your Work2Go Pro account.

  • Click the Zimbra top or
  • Go to Tools > Inbox quotas.

Synchronizing with Outlook [PRO]

This guide shows you how to first install an add-on for Outlook and then add an account, so you can work with e-mails, contacts and calendar etc. in Outlook.

You can synchronize their Work2Go Pro with Outlook. Then you not only access to their e-mail in Outlook, but also his signature, contacts, calendar and task list. To synchronize needed an addition to your Outlook. There are two different versions depending on the version of Outlook that you have on your computer and available for download on the right of this page.

Installation of the plug-in for Outlook
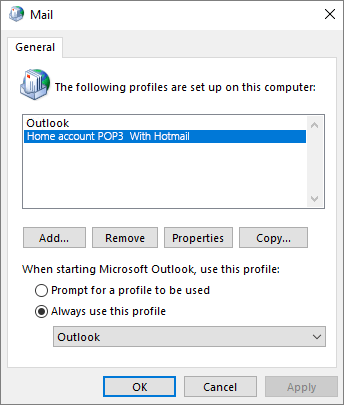
1_outlook_addNOTE! If you have used Outlook before, you should save your previous profile in Outlook before installing. Read more on Microsoft support site.

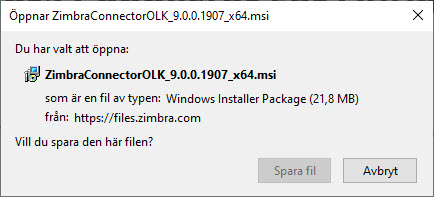
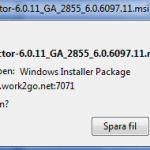
1. Download the add-on to your computer and select that you want to save the file. When the file is saved onto your computer, you get this icon on your desktop. Double-click it to start up the installation > Run > Next.

Click image for full version.
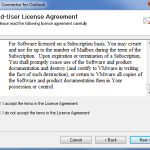
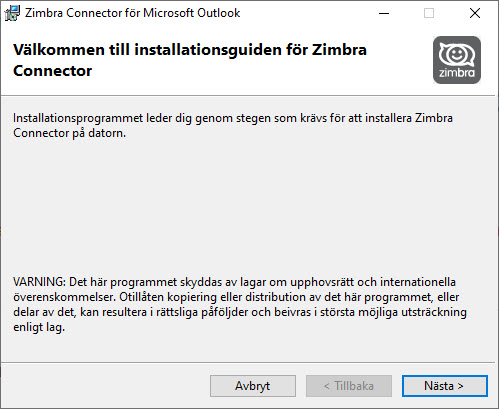
5_outlook_add2. Accept the terms > Next > Next to start the installation.

Click image for full version.
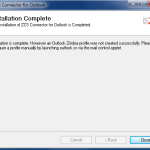


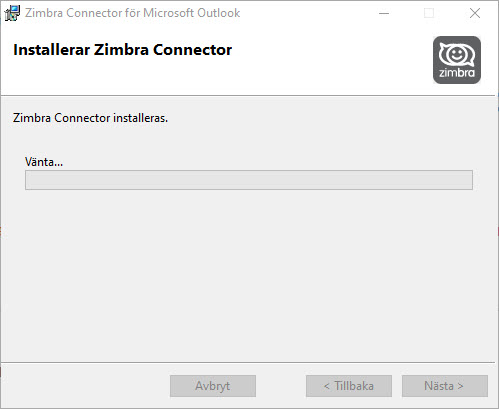
8_outlook_add3. When the installation is complete, you will also need to set up a profile in Outlook. Click Close to close the box.

Click image for full version.


14. Start Outlook. Box to the right should then open automatically.
If it doesn’t, you can find it under File > Data Files \ Setup

Click image for full version.

Server name: m.work2go.net
Use secure connection.
Enter your e-mail address (e-mail address that you use when you log into your account) and your password.

25. Go to Connection settings.
Do not choose a proxy
(unless your network administrator says otherwise).

Click image for full version.


36. Go to Downloads Settings.
Here we recommend selecting the Download headers only. If you frequently work in Outlook while you are offline, you should however NOT have this box checked. Finish with the Apply > OK.

Click image for full version.

Now the information begins to be sync from your Work2Go to Outlook. The first time the process can take quite a while, depending on how much information should be synced. If it does not start automatically, click Send and receive.
Strikethrough e-mails in Outlook

Can you see e-mails that are strikethrough in Outlook after you decided to delete them? Here we explain how you can change this.

You can change your account settings so that your e-mails will not only be marked for removal, but they end up in the trash instead.

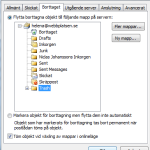
  1. outlook_trashKlicka fliken Arkiv.
  2. Kontoinställningar > Kontoinställningar.
  3. Klicka på det IMAP-konto du vill ändra på fliken E-post och sedan Ändra > Fler inställningar.
  4. På fliken Borttaget väljer du Flytta borttagna objekt till följande mapp på servern och klickar sedan på Trash.

Click image for full version.

You can also connect your Outlook sent folder to Work2Go
This helps avoid duplicate folders on your account.
Click the tab Sent > Save sent items in the following folder on the server > Sent.

Can’t send nor receive e-mail in Mac Mail

Are you not receiving emails on your computer? Or you can not send? Go through the following steps to check the settings.

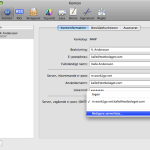
MacMail_Fel_11. Check your account settings

  1. Go to Mail > Settings > Account > Account information.
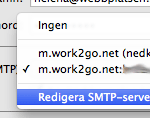
  2. Click Edit Server List.
  3. You can find Server Outgoing mail (SMTP)” at the bottom of the Account Information page.

Click image for full version.

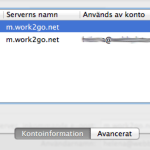
2. Delete any duplicate e-mail server

9-IMAP_Mac10.9-serverlistaIf it looks like the image, i.e. a line that only says m.work2go.net but without an email address. Click on that row (without an email address) so that it becomes highlighted, and then on the (-) minus sign down in the left corner to delete that.

Click image for full version.

3. Check the mail server ports

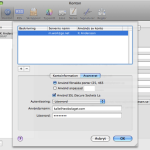
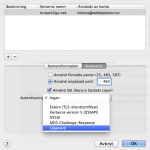
MacMail_Fel_2Outgoing server: Go to Advanced.

  • Use port 465 (or 587).
  • Use SSL.
  • Fill in username and password again.
    (Test your login details by signing in to your account on work2go.net)

Click OK.

Click image for full version.

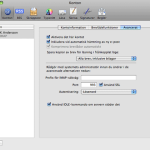
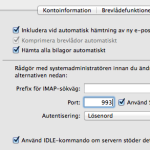
MacMail_Fel_3Incoming server: Go to Advanced on top of the page.

  • Port: 993
  • Use SSL.
  • Fill in username and password again.
  • (Test your login details by signing in to your account on work2go.net)

Click image for full version.

Can’t send e-mail in ZD Work2Go Mail

Can’t send email from your computer? Go through the steps below to check the settings.
  1. Do you have the correct username and password?
    Test them by logging in to your Work2Go in a browser: work2go.net
  2. Your account is not full already, is it?
    Hold your cursor over your name in the upper right corner of Work2Go to see your account size.
  3. Open ZD Work2Go Mail and go through all the settings for the account and re-enter the password. Check the box for Username and password required to send mail.

If the above did not help, contact our support.

Can’t send e-mail in Thunderbird

Can’t send email from your computer? Go through the following steps to check the settings and if that does not help, try another security type and port.
  1. Do you have the correct username and password?
    Test them by logging in to your Work2Go in a browser: https://www.work2go.net/
  2. Your account is not full already, is it?
    Hold your cursor over your name in the upper right corner of Work2Go to see your account size.
  3. Open Thunderbird and go through all the settings for the account and re-enter the password.
  4. Change to no SSL and port 2525.

Can’t receive e-mails in ZD Work2Go Mail

Are you not receiving emails on your computer? Go through the steps below to check the settings.
  1. Are you using the correct username and password?
    Test them by logging in to your Work2Go in a browser: work2go.net
  2. You haven’t acceded your account limited size, have you?
    Hover your cursor over your name in the upper right corner of Work2Go to see your account size.
  3. Open ZD Work2Go Mail, go through all the settings for the account, and re-type the password.

If the above did not help, contact our support.

Can’t receive e-mails in Thunderbird

Don’t you receive any e-mails to your computer? Go through the following steps to check the settings.
  1. Are you using the correct username and password?
    Test them by logging in to your Work2Go in a browser: https://www.work2go.net/
  2. You haven’t acceded your account limited size, have you?
    Hover your cursor over your name in the upper right corner of Work2Go to see your account size.
  3. Open Thunderbird and go through all the settings for the account, and re-type the password.
  4. Remove SSL and change to port 143.


Add an e-mail account in Mac Mail

Follow our step by step guide of how to create an account to read and send e-mails from your computer. Do you already know how, click the box below for account settings.

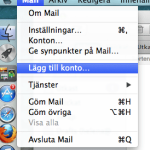
1-IMAP_Mac10.9-start1. Open the program

Click Mail > Add Account.
(If it’s the first time you use Mail the wizard will open when you start the program.)

Click image for full version.

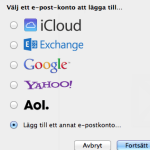
2-IMAP_Mac10.9-nytt2. Add an e-mail account

Start by choosing Add another email account > Continue.

Click image for full version.


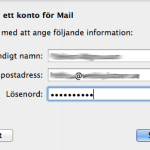
3-IMAP-epost3. Enter email address and password

Full name, username/email address and password > Login.


4. Enter email address and password

Fill in the e-mail address and mail server again as shown in the image > Log in.
Mail server: m.work2go.net

5. Specify which functions you want to use

Select which functions you want to use > Done

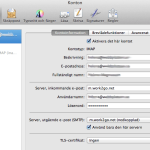
7-IMAP_Mac10.9-kontoinfoAdjust the settings

To see more settings, go to Mail > Settings at the top of the menu bar of the program. Select your new Work2Go IMAP account so that it is highlighted in blue and the account’s settings are displayed on the right.

Click image for full version.

8-IMAP_Mac10.9-smtp-listaServer, outgoing e-mail (SMTP)

Click the arrows to open the drop-down menu.
Select Edit SMTP Server List.

Click image for full version.


10-IMAP_Mac10.9-serverUTpasswoClick Advanced.
Use custom port: 465 (alt. 587).
Use SSL.
Authentication: select Password from the drop-down menu.
Enter your username/email address and password.
Click OK to save the settings.

Click image for full version.

12-IMAP_Mac10.9-serverINportServer, incoming e-mail

Click Advanced at the top.
Server port: 993.
Use SSL.
Authentication: select Password from the drop-down menu.

Click image for full version.

When you close the box by clicking the red circle in the top corner, you will be asked if you want to save the changes you have made to the account. Click Save.
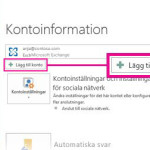
Add an e-mail account in Outlook

Follow our step by step guide of how to create an account to read and send e-mails from your computer. Do you already know how, click the box below for account settings.

This guide shows you how to add a new account in Outlook 2013.
If you have another version of Outlook, see Add Account in other versions of Outlook at the bottom of the page.
outlook-2013-11. Open the program
Go to File > Add Account.
Click Configure server settings manually > Next.
Choose Internet E-mail > Next.

Click image for full version.

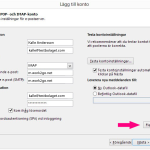
2. Add your account settings

outlook-2013-2Your name: the name you want to use as the sender.
E-mail address: Your e-mail address.

Account Type: select IMAP.
Server incoming mail: m.work2go.net
Server outgoing e-mail: m.work2go.net

Username: your email address.
Password: your password for your Work2Go account.
NOTE! Requires the Secure Password Authentication (SPA) should NOT be selected!
Click More Settings.

Click image for full version.

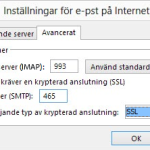
3. Adjust the settings

outlook-2013-3Outgoing serverselect outgoing server requires authentication.
Advanced – Incoming server (IMAP): 993 and SSL.
Outgoing server (SMTP): 465 and SSL.
Click OK > Next.
Then click Close > Finish.

Click image for full version.


For older versions of Outlook

In older versions there are different ways to reach Step 2 Add your account settings.

Outlook 2010

  1. Start the program.
  2. Go to File > Info> Account Settings.
  3. In the E-mail tab, select New.
  4. Choose to configure server settings manually.
  5. Then click Next > Internet E-mail > Next.
  6. Continue with step 2 Add your account settings.

Outlook 2007

  1. Start the program.
  2. Go to Tools > Account Settings.
  3. Select Microsoft Exchange, POP3, IMAP or HTTP > Next.
  4. Choose to configure server settings manually > Next.
  5. Continue with step 2 Add your account settings.

Äldre versioner av Outlook och Outlook Express

  1. Start the program.
  2. Go to Tools > E-mail account (Accounts in Outlook Express).
  3. Select Add a new e-mail account > Next.
  4. Select server type IMAP.
  5. Continue with step 2 Add your account settings.

Add an e-mail account in ZD Work2Go Mail

Follow our step by step guide of how to create an account to read and send e-mails from your computer. Do you already know how, click the box below for account settings.

add_accouuntZimbra11. Start ZD Work2Go Mail> Add new account at the bottom right.

Click image for full version.


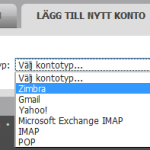
ZimbraDesktop12. Select account type: Zimbra.

Click image for full version.


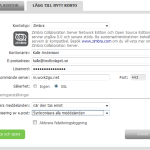
ZimbraDesktop23. Add your account settings.

Account Name: The name that appears as the sender.
Email address: Your e-mail address.
Password: password.
Incoming mail server: m.work2go.net
Port: 443
Security SSL.

Finish by clicking Confirm > Save.


Click image for full version.