Archive | Support EN

Confirm a meeting invitation

Learn what you can do when someone invites you to a meeting.

When you receive a meeting invitation, the meeting is automatically added to your Calendar and you confirm whether you can attend or not in the email sent to you. You can also confirm an invitation by right-clicking the meeting in your Calendar.

  1. Choose Accept, Decline or Tentative – which means you’re not yet sure if you’re able to participate.
  2. When you’re confirming you can also decide if you want to send a notification email and you can also add your own message to it, by clicking the arrow next to the options.
  3. You can also save the meeting in another Calendar if you want. Select the correct Calendar in the top-right corner of the email.
  4. If the meeting is a recurring meeting, you can also choose whether to confirm each occurrence or for the entire series.
  5. Once you’ve confirmed, the invitation email is automatically added to your Trash.
    NOTE: If you want to keep the invitation in your inbox, you can change this at Preferences > Calendar: General and untick the box for After responding to an invitation: Delete invite on reply.

NOTE! If you want to keep the invitation in your inbox, you can change the setting in the Preferences tab> Calendar: General. There, uncheck the box in response to the invitation: Remove the invitation of replies.

Change your answer or another changes

If you want to undo your answer or want to change a setting (eg in which calendar the meeting should be saved in), you can right-click the meeting in your calendar and change. The meeting is visible in your calendar even though you chose to decline. This is because you will have the opportunity to change your mind. If you do not want declined meetings to appear in the calendar, you can change this. Go to the Preferences tab > Calendar > General: Here in the top box, you can uncheck the box next to Show declined meetings.

Confirm an appointment from a non-Work2Go calendar

When you receive an invitation with an attached .ics file, click Add in calendar at the top of the message to save the invitation in your calendar. Select the calendar in which the invitation should be saved to.


Find your way around in the HTML standard version

All features available in the Advanced (Ajax) version is not supportedwhen you log in with HTML standard version. Here is more information.

7_HTML_versionen

Features such as drag and drop, creating a meeting by clicking on the mini calendar in the left column, right-click to get the option to move, change properties, delete etc. does not function in the HTML Standard version. But you can still perform multiple selections in HTML standard, only a little different from what you are used to. Here are some examples.

  1. Change the properties for a folder / tag / calendar / address book, etc. > click edit.
  2. Move an email message, select the message > Move to.
  3. Deleting a file, select the file> Delete.


Delete / restore to a previous version of the file

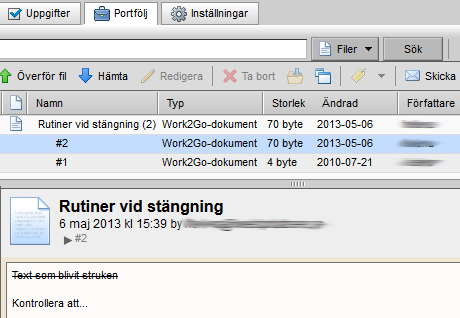
Once you’ve made a change in one of your files in the briefcase, a new version of the file will be saved. Do you regret a change, only return to the previous again.

Click on the triangle in front of the file to see all the versions saved of the file.

w2g_versionsDelete

Right-click the version you want to delete > Delete.

Reset

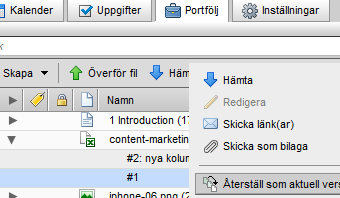
Do you want to restore the file to a specific version, right-click the version you want to use > Reset current version.


Keep your eyes on your colleague’s inbox

If your colleague doesn’t have the ability to log into their account for a period of time, you can set it up so that you receive an alert to your inbox when your colleague receives new s e-mails.

The information in the message is; who sent the e-mail and its subject. This is sent out at the same time as the original message is received. This way you can also find out when the original e-mail was sent.

  1. On your colleague’s account, go to the Preferences tab> Mail: Receiving messages
  2. Enable the notifications of new emails and fill in your e-mail address.

Forward e-mail to another address

You can also forward copies of incoming e-mails to another e-mail address and select whether the message should be saved in the inbox or not. The setting is made in the same place, ie Preferences > E-mail: Receiving messages.

Ask your colleague to send emails for you

Here we tell you how you can get help from a colleague to send e-mails so that they appear to come from you without sharing your inbox.

You can give other users permission to send e-mail on your behalf, from their own account. You can share a folder you need help with, but the sharing isn’t necessary.

  1. Go to the Preferences tab > Accounts.
  2. Check that the primary account is selected and click Add Delegat at the bottom of the page.
  3. Enter the e-mail address of the person you want to delegate permissions to. This must be an internal user address (ie an e-mail address with the same domain after the @ as yours).
  4. Add the sender for the messages that will be sent on your behalf.
    Send as only your email address as the sender
    Send for both your and your colleague’s email address as the sender
  5. Click on OK to save.
  6. An email message is sent to your colleague telling you that you have given the person permission to send e-mails on your behalf. Your colleague now needs to log out and log back in to their account for the change to go through.
  7. When your colleague creates a new e-mail message s/he choose your name from the dropdown menu at the From field.

Print a calendar

Step by step how you print a calendar.

kalender-utskrift_W2G8

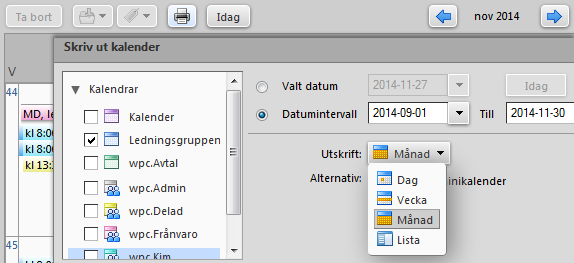
  1. Click on the printer icon in the toolbar.
  2. Print Calendar dialog box opens.
  3. Choose what / which calendar you want to print, date range and view (menu printing).
  4. Click print.

Collect sent e-mails when replying from a shared inbox

When you reply to a message in a shared mailbox, the other ones (who also has access to that mailbox) can see that you have replied, but not what you have replied. The answer itself ends up in your own private sent folder.

To collect your answers you can create a folder and a filter.

  1. Create a new folder that you save in the level below the shared folder.
  2. Go to the Preferences tab > Filters.
  3. Click the Outgoing Message filter> New filter.
  4. Give the filter a suitable name and the conditions as in the picture below.
  5. Keep the box in front of the Do not process more filter selected > OK.

filter-villkor

Create and update a mailing list [ADMIN]

Distribution lists / mailing lists are administered when logging in to the Administrator account. Here we tell you step by step how.

alias1Log in to the admin account. It’s usually admin@yourdomain.com but not always. If you are not sure which account is your administrator account you just contact our support. It is only on an administrator account you see Admin console under your name.

1. Log in to the admin account.
All have at least one administrator account and usually it’s e-mail address
 admin@yourdomain.com

2. Click the arrow next to the account name in the top right corner to select the Admin Console and log into the admin interface (same login as your account, you are already logged in).

3. Click Manage in the left column and then Distribution lists.

DL_admin

4. At the top right, click the gear > New.

5. Fill in a name / e-mail address, for example staff@yourdomain.com if you want to create a mailing list to easily send e-mails to everyone in the company (those included in the list).

6. Add e-mail addresses to the list.
Either by searching for their name in the top right corner or by entering their e-mail address in the box below. Click Add / Add All> Next.

  • Display Name: What you want to call your list.
    Also fill in a description for the list if needed, this is not visible externally.
  • Can receive e-mail: mark this.
  • Hide in the global address list: do not mark this.

7. Click Finish.

Show the Content

  1. Go to the Settings tab > Import / Export> Export.
  2. Select Contacts – Account Contacts.
  3. Source: Select the Address Book > OK > Export.
  4. Open the file in Excel or similar programs.
  5. Select the email addresses you want to include in the list. Copy and paste them into a word process program such as Notepad.
  6. Log in to the administrator account and create a mailing list.
  7. Copy addresses (eg from Notepad) and place them in the box at the bottom right.
  8. Add > Finish.

Administration of a mailing list

  • When you want to add a new contact just log in, look for the list and add the new contact to it.
  • When an account is deleted the address disappears from the list automatically.

Delete e-mails

E-mails can be deleted in several ways and if you change your mind, you can easily change your mind.
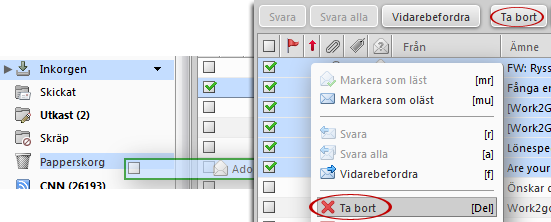
  • Drag and drop to the trash.
  • Select one in the list > click Delete in the toolbar.
  • Select one in the list > right click > Delete.

ta-bort

Cancel previous action of deleting a message

It’s possible to cancel previous action when one has just performed an action such as deleting an email message. Just click on the Undo at the top of the page.

angra_misstag

Recover deleted e-mail

It’s possible to retrieve deleted messages, even if they are left in your trash.

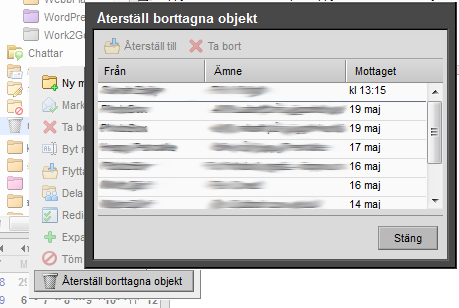
  • Right-click the Trash and select Restore deleted items.
  • Now choose if you want to read back all or just pick out one or two of them.
  • For multiple selections, hold down the Ctrl key when you select the ones you want to restore.

aterstalla_mejl

Can’t save user name and password

Try these steps to resolve the issue.

If your browser won’t save your user name and password, even though you have ticked the box “Remember me on this computer” when logging in, you may need to verify that your browser allows you to save data. Although Work2Go is set to save your user name and password, the browser has the final say.

Firefox

  1. Tools > Preferences
  2. Security
  3. Verify that “Remember Password” is checked.

Internet Explorer

  1. Tools > Internet Options
  2. Content tab > Settings
    Here you set if your browser should save your user name and password.

Safari

  1. Safari > Settings (mac)
  2. Edit > Settings (windows)
  3. AutoFill > AutoFill Web forms tick the option User Name and Password

Google Chrome

  1. Click on the three lines in the upper right corner (Customize and control Chrome) and you will see a menu.
  2. Select Settings.
  3. Click Show advanced settings … at the bottom of the list.
  4. In the Password and Form check the box to “save passwords …”

Show the Content

If your login details still aren’t saved in your browser, even though you checked the Remember me on this computer , and you have set your browser to save usernames and passwords for web sites, you can solve this issue by creating a bookmark / favorite.

  • Create a bookmark / favorite with the URL-address like this: https://www.work2go.net/?username= name@yourdomain.com Change “name@yourdomain.com” to your e-mail address.
  • You can even include your password in the URL to also get the password saved: https://www.work2go.net/?username= name@yourdomain.com&password=yourPassword
    Change “name@yourdomain.com” again and “yourPassword” to your Work2Go password.

NOTE! We do not recommend our users to save their password in the URL since it involves unnecessary security risks!

Can’t receive e-mails in ZD Work2Go Mail

Are you not receiving emails on your computer? Go through the steps below to check the settings.
  1. Are you using the correct username and password?
    Test them by logging in to your Work2Go in a browser: work2go.net
  2. You haven’t acceded your account limited size, have you?
    Hover your cursor over your name in the upper right corner of Work2Go to see your account size.
  3. Open ZD Work2Go Mail, go through all the settings for the account, and re-type the password.

If the above did not help, contact our support.

Can’t receive e-mails in Thunderbird

Don’t you receive any e-mails to your computer? Go through the following steps to check the settings.
  1. Are you using the correct username and password?
    Test them by logging in to your Work2Go in a browser: https://www.work2go.net/
  2. You haven’t acceded your account limited size, have you?
    Hover your cursor over your name in the upper right corner of Work2Go to see your account size.
  3. Open Thunderbird and go through all the settings for the account, and re-type the password.
  4. Remove SSL and change to port 143.


Add private reminders

To get a reminder from your calendar without showing your colleagues what you want to be reminded of, you can create private posts.
  1. Open your calendar and choose New Booked meeting in the top left corner.
  2. Fill in the required information for your personal reminder.
  3. Show: choose Free if you think it‘s OK for others to book you on meetings at the appointed time. Select Busy if you do not want to be disturbed.
  4. Check that you have decided to create the post in your calendar and mark it as Private.
    Then others can only see the time that you’re busy, not the reason.
  5. Save and activate reminders in your calendar, click Save and Close in the top left corner.

The result

7_privat4

Figure 1: Your calendar shows you all the information you have added as private posts (purple).

7_privat5

Figure 2: Your colleague’s calendar shows only the time that you have added to your Calendar (purple).

Add an e-mail account in Mac Mail

Follow our step by step guide of how to create an account to read and send e-mails from your computer. Do you already know how, click the box below for account settings.

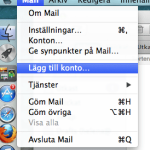
1-IMAP_Mac10.9-start1. Open the program

Click Mail > Add Account.
(If it’s the first time you use Mail the wizard will open when you start the program.)

Click image for full version.

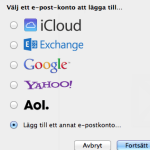
2-IMAP_Mac10.9-nytt2. Add an e-mail account

Start by choosing Add another email account > Continue.

Click image for full version.


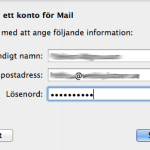
3-IMAP-epost3. Enter email address and password

Full name, username/email address and password > Login.


4. Enter email address and password

Fill in the e-mail address and mail server again as shown in the image > Log in.
Mail server: m.work2go.net

5. Specify which functions you want to use

Select which functions you want to use > Done

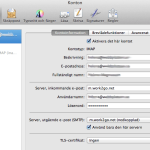
7-IMAP_Mac10.9-kontoinfoAdjust the settings

To see more settings, go to Mail > Settings at the top of the menu bar of the program. Select your new Work2Go IMAP account so that it is highlighted in blue and the account’s settings are displayed on the right.

Click image for full version.

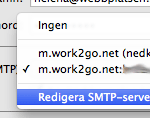
8-IMAP_Mac10.9-smtp-listaServer, outgoing e-mail (SMTP)

Click the arrows to open the drop-down menu.
Select Edit SMTP Server List.

Click image for full version.


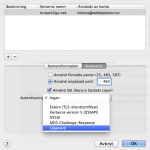
10-IMAP_Mac10.9-serverUTpasswoClick Advanced.
Use custom port: 465 (alt. 587).
Use SSL.
Authentication: select Password from the drop-down menu.
Enter your username/email address and password.
Click OK to save the settings.

Click image for full version.

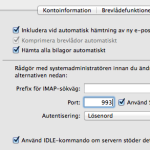
12-IMAP_Mac10.9-serverINportServer, incoming e-mail

Click Advanced at the top.
Server port: 993.
Use SSL.
Authentication: select Password from the drop-down menu.

Click image for full version.

When you close the box by clicking the red circle in the top corner, you will be asked if you want to save the changes you have made to the account. Click Save.

Add an e-mail account in Outlook

Follow our step by step guide of how to create an account to read and send e-mails from your computer. Do you already know how, click the box below for account settings.

This guide shows you how to add a new account in Outlook 2013.
If you have another version of Outlook, see Add Account in other versions of Outlook at the bottom of the page.

outlook-2013-11. Open the program

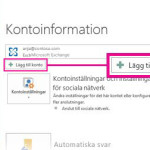
Go to File > Add Account.
Click Configure server settings manually > Next.
Choose Internet E-mail > Next.

Click image for full version.

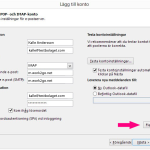
2. Add your account settings

outlook-2013-2Your name: the name you want to use as the sender.
E-mail address: Your e-mail address.

Account Type: select IMAP.
Server incoming mail: m.work2go.net
Server outgoing e-mail: m.work2go.net

Username: your email address.
Password: your password for your Work2Go account.
NOTE! Requires the Secure Password Authentication (SPA) should NOT be selected!
Click More Settings.

Click image for full version.

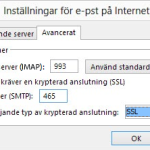
3. Adjust the settings

outlook-2013-3Outgoing serverselect outgoing server requires authentication.
Advanced – Incoming server (IMAP): 993 and SSL.
Outgoing server (SMTP): 465 and SSL.
Click OK > Next.
Then click Close > Finish.

Click image for full version.


For older versions of Outlook

In older versions there are different ways to reach Step 2 Add your account settings.

Outlook 2010

  1. Start the program.
  2. Go to File > Info> Account Settings.
  3. In the E-mail tab, select New.
  4. Choose to configure server settings manually.
  5. Then click Next > Internet E-mail > Next.
  6. Continue with step 2 Add your account settings.

Outlook 2007

  1. Start the program.
  2. Go to Tools > Account Settings.
  3. Select Microsoft Exchange, POP3, IMAP or HTTP > Next.
  4. Choose to configure server settings manually > Next.
  5. Continue with step 2 Add your account settings.

Äldre versioner av Outlook och Outlook Express

  1. Start the program.
  2. Go to Tools > E-mail account (Accounts in Outlook Express).
  3. Select Add a new e-mail account > Next.
  4. Select server type IMAP.
  5. Continue with step 2 Add your account settings.

Add an e-mail account in ZD Work2Go Mail

Follow our step by step guide of how to create an account to read and send e-mails from your computer. Do you already know how, click the box below for account settings.

add_accouuntZimbra11. Start ZD Work2Go Mail> Add new account at the bottom right.

Click image for full version.


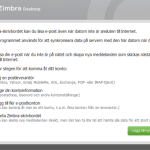
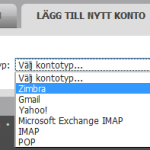
ZimbraDesktop12. Select account type: Zimbra.

Click image for full version.


ZimbraDesktop23. Add your account settings.

Account Name: The name that appears as the sender.
Email address: Your e-mail address.
Password: password.
Incoming mail server: m.work2go.net
Port: 443
Security SSL.

Finish by clicking Confirm > Save.


Click image for full version.


Add an e-mail account in Thunderbird

Follow our step by step guide of how to create an account to read and send e-mails from your computer. Do you already know how, click the box below for account settings.

Thunderbird_11. Open the program

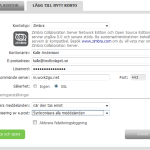
Start Thunderbird and then click Tools > Account Settings.
Under Account Actions, select Add e-mail account.

Click image for full version.

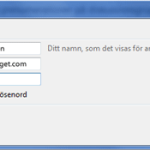
Thunderbird_22. Add your account settings

Enter your name, e-mail address and password.
Tick the box to save the password.
Click Continue > Manual Setup.

Click image for full version.

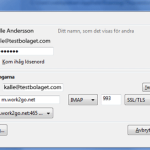
3. Adjust the settings

Thunderbird_3Username: your email address (the one you use to log in)
Incoming: IMAP | m.work2go.net | 993 | SSL / TLS | Password
Outgoing SMTP | m.work2go.net | 465 | SSL / TSL | Password

Click Test again to verify that you have entered the correct settings.
Click Create Account.

Click image for full version.


How filters can be used to simplify your day

Using e-mail filters increases the efficiency of your work. Here we tell you how filters can help you to manage all your messages.

You can create filters based on a number of different rules to get your messages sorted in different folders and gain control of the information flow, which in turn gives you more time for other work.

You can easily have them active periodically by a click.

Filter for incoming messages

  • Sort messages into folders based on conditions such as email address, subject, size, date, content, attachments and Calendar invitation.
  • Use multiple conditions for one and the same filter.
  • Automatically tag messages with tags, a flag or as read.
  • Move incoming messages to a specific folder.
  • Forward a message to another address.
  • Discard a message. Which means that the message will not reach your mailbox at all.

Filter for outgoing messages

  • Sort outgoing messages from the sent folder to another specified folder.
  • Mark e-mails with a tag.
  • Forward outgoing messages to another e-mail address.

NOTE! After creating a filter you can run the filter through your inbox. The only thing you need to do is select the filter and then click Run filters.

File Versioning

Once you’ve made a change in one of your files in the briefcase, a new version of the file will be saved. Do you regret the change, only return to the previous version again.

versionshantering

The briefcase supports versioning of files. Each time you download a file, make a change to it and save it again, the file version number increase. It is always the latest version that is displayed at the top of the list in the briefcase. In this way one can easily see when the last change was made and by whom. You can go open each different version and if you do not want to keep a version, simply remove it.

Share your contacts with your colleagues

Here we tell you step by step how you share your contacts.

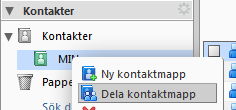
dela_kontaktWhen sharing an Address Book, a copy of the original is placed in the other user’s left column and therefor one will not need to log in to the other person’s account to access the contact in the Address Book.

1. Right-click address book > Share Address Book.
2. Choose who you want to share the Address Book with:

Internal users or groups
The user or group must have a valid email address in Work2Go. Assign them one of the following roles:

  • None: An option you use to temporarily disable access to a shared Address Book without canceling the sharing. The Address Book will still remain in the other person’s account, but they won’t be able to view its content.
  • Viewer: can read the content, but can’t make any changes to it.
  • Manager: has full permission to read and edit the content. They can also create new Address Books, and delete it’s content.
  • Admin: has full permissions to read, edit, add, delete, accept or decline invitations and administrate its content.

External guests
They can only read the content of the Address Book, not make any changes. Just enter their email addresses and provide them with a password to view the content.

Public
They can only read the content of the Address Book and don’t need a password for it. Hand out the URL that appears in the box below. Right-click it and select ”Copy link” to get hold of the full URL. Anyone who knows about the URL to this folder will be able to see its content. No one can however make any changes to it.

3. In the Message area, select the type of message you want to send out to those you want to share your Address Book with.
4. Click OK when you’re done.

Shared contacts for everyone at the company

If you want to collect addresses of all of the company to have access to, we recommend that you create it on your admin account. Since you share the address book to everyone. If the shared address book would be available on an employee’s account at a later time stops, there is a risk that your shared address book deleted when their account is deleted.