Archive | E-mail

Create log file if problems occur with sync in Outlook [PRO]

If synchronization is not working correctly or if you get an error message when you have Outlook Connector installed, we want you to activate the tool ZCO logging.

This reqires Work2Go Pro + Outlook Connector

If you don’t have Pro today, you can upgrade by contacting our support.
If you haven’t installed the Outlook Connector yet, follow the guide Synchronizing with Outlook [PRO]
This tool (ZCOLogCtl.exe) is installed together with the Outlook Connector.
You find it here: C: \ Program Files \ Common Files \ System \ MSMAPI

zco_log1. Double-click the file and enter the following information.

Enable: Enable Logging, HTTP Logging, Verbose Logging
Path: select a location where the log files will be saved
Prefix: ZCO
Maximum Log File Size (MB): 10
Click OK to activate the tool.

Click image for full version.

2. Restart Outlook and recreate your problem.
3. Go back to ZCO logging tool and uncheck the Enable Logging.
4. Restart Outlook again.
5. Pack the log files and send them to us for analysis.

Remove a contact from the proposed ones

Here we explain how you can remove the suggested contacts that you no longer want when sending e-mail.

When writing a message and fill in the recipient’s e-mail address you only need to enter the beginning of the address. Work2Go show automatically a list of e-mail addresses you have sent e-mails to earlier or saved in your address book.

If you have a contact with multiple e-mail addresses, which you use both, the adress you use more often are always at the top of the list. This ensures that you continually get the most use the address only for efficient use of your Work2Go.

foreget-address

But this also means that invalid addresses can appear in this list. You might, for example misstyped one once and tried to send mail to it which then bounced. Also this addresses is saved. But you can do something about this, you can hide it from the list and thus avoid taking the wrong one again. The only thing you need to do is click on the right ‘Forget’ next to the address.


Find the largest files on your account

You can easily find the messages and files that are largest in your account by sorting them in order of size, both among your e-mails and in your briefcase.


storlek

  1. Use the view mode Reading Pane at the bottom / off by clicking View on the toolbar.
  2. Click Size in the toolbar to sort by its size.


Manual update of the Outlook Connector [PRO]

Once you have installed the Outlook Connector version number 7.x, you can update to a newer version of the program.

This requires Work2Go Pro + Outlook Connector

If you don’t have Pro today, you can upgrade by contacting our support.
If you haven’t installed the Outlook Connector yet, follow the guide Synchronizing with Outlook [PRO]
ZCO-Outlook-2010-w2g


ZconnectorOutlook 2010/2013

Go to the Zimbra > Check for updates (top right corner).
If there is a new version to update you can do so by clicking Upgrade in the popup window.

Outlook 2007

Go to Help > Check for updates. If there is a new version to update you can do so by clicking Upgrade.


Send to multiple contacts in an address book

If you send e-mail to multiple contacts at the same time we recommend following steps.
  1. Check your settings for e-mail addresses, you should not use addresses as bubbles now.
    Preferences > General > Other
  2. Remove the check mark that are in the box in front of Show email addresses in bubbles > Save.
  3. Open the Address Book and choose the ones you want to send to. Select multiple contacts with Ctrl + click or Shift + click to select as a serie.
  4. Right-click one of the selected contacts > New e-mail message.
  5. Select all the contacts that have now fallen into the To box, right-click > Cut.
  6. Click Show Bcc and put the cursor in the Bcc box, right-click > Paste.
  7. Enter the e-mail address in the To box because some mail servers do not accept empty To field.
  8. Send.

Import an address book to Thunderbird

You can move your contacts in Work2Go to your account in Thunderbird through the following steps.

Export Address Book from Work2Go

  1. Settings > Import / Export > Export
  2. Type: Contacts and select the Thunderbird contacts in the drop down list
  3. Source: select your address.
  4. Click Export

Import it into Thunderbird

  1. Tools > Import
  2. Select that you want to import address books> Next
  3. Select the import option Text file (LDIF, .tab, .csv, .txt)> Next
  4. Find the file and select which fields you want to import.
  5. Click OK > Finish


Moving e-mails from another account to Work2Go

Here are a convenient way to move e-mails from another email account to your new one in Work2Go.

It is possible to move e-mails from your old e-mail program to your new in Work2Go. But think twice if it’sreally necessary? Many users testify to how good it actually felt to get a fresh new start.

Add your Work2Go-account in your old e-mail program

  1. Open the application where you have your old messages that you want to move to Work2Go.
  2. Add a new account and enter the following.
    Protocols: IMAP (not POP3!)
    Server: m.work2go.net
    Username: your login ID in Work2Go (usually your email address)
    Password: your password in Work2Go
  3. Now you can drag and drop your old messages to the / to the new folders created when you added Work2Go in your email program.
  4. When you are finished, log in Work2Go in a browser and verify that all e-mail is moved, just as you want it.
  5. Return to the old e-mail and delete it you will no longer want to keep.

Choose a signature when you send e-mails

signatur_w2g8

You can create multiple signatures on the Preferences tab. One of them becomes your normal signature that shows up automatically in your message when you write a new one.

If you would rather use another of your signature when you send a message, go to Options in the message > select Signature.

Send from another persona

Would you like the message to appears coming from a different role than your private, for example from you in the role of answering economic questions, you can create a persona and maybe even a separate signature for.

See your account size in Outlook [PRO]

This reqires Work2Go Pro + Outlook Connector

If you don’t have Pro today, you can upgrade by contacting our support.
If you haven’t installed the Outlook Connector yet, follow the guide Synchronizing with Outlook [PRO]
If you have installed the Outlook Connector and want to see how much disk space you use on your Work2Go Pro account.

  • Click the Zimbra top or
  • Go to Tools > Inbox quotas.

Synchronizing with Outlook [PRO]

This guide shows you how to first install an add-on for Outlook and then add an account, so you can work with e-mails, contacts and calendar etc. in Outlook.

You can synchronize their Work2Go Pro with Outlook. Then you not only access to their e-mail in Outlook, but also his signature, contacts, calendar and task list. To synchronize needed an addition to your Outlook. There are two different versions depending on the version of Outlook that you have on your computer and available for download on the right of this page.

Installation of the plug-in for Outlook

1_outlook_addNOTE! If you have used Outlook before, you should save your previous profile in Outlook before installing. Read more on Microsoft support site.

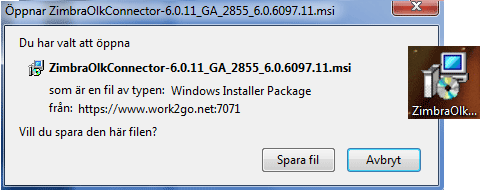
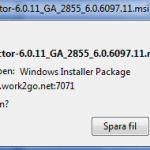
1. Download the add-on to your computer and select that you want to save the file. When the file is saved onto your computer, you get this icon on your desktop. Double-click it to start up the installation > Run > Next.

Click image for full version.

5_outlook_add
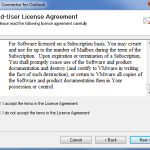
2. Accept the terms > Next > Next to start the installation.

Click image for full version.


8_outlook_add
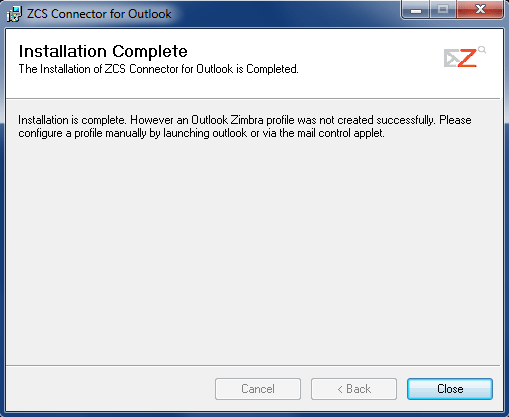
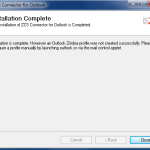
3. When the installation is complete, you will also need to set up a profile in Outlook. Click Close to close the box.

Click image for full version.


1
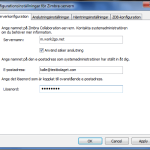
4. Start Outlook. Box to the right should then open automatically.
If it doesn’t, you can find it under File > Data Files \ Setup

Click image for full version.

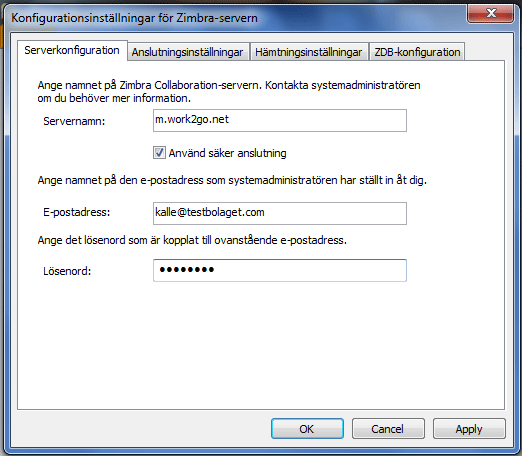
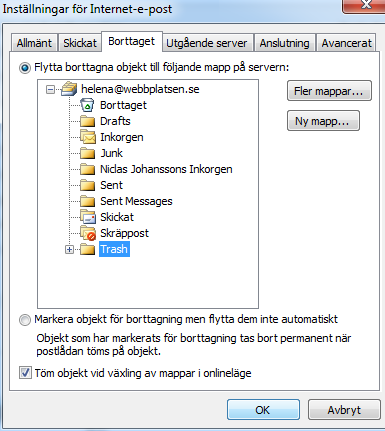
Server name: m.work2go.net
Use secure connection.
Enter your e-mail address (e-mail address that you use when you log into your account) and your password.

2
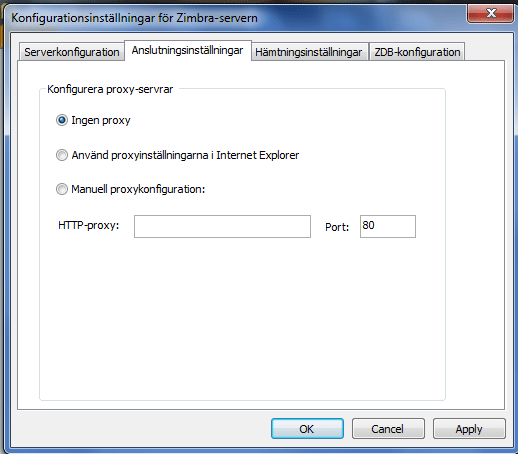
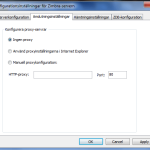
5. Go to Connection settings.
Do not choose a proxy
(unless your network administrator says otherwise).

Click image for full version.


3
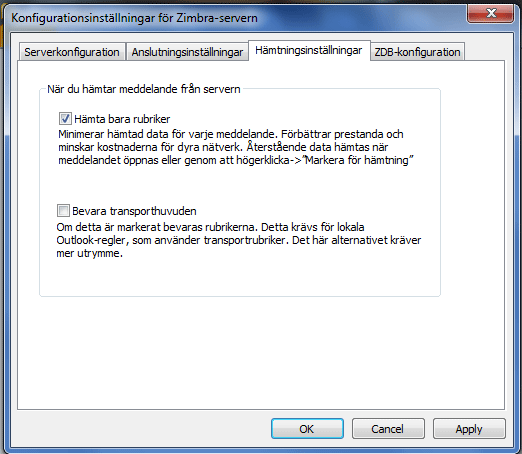
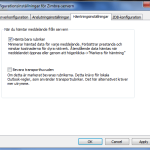
6. Go to Downloads Settings.
Here we recommend selecting the Download headers only. If you frequently work in Outlook while you are offline, you should however NOT have this box checked. Finish with the Apply > OK.

Click image for full version.

Now the information begins to be sync from your Work2Go to Outlook. The first time the process can take quite a while, depending on how much information should be synced. If it does not start automatically, click Send and receive.
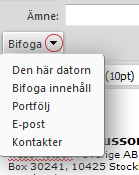
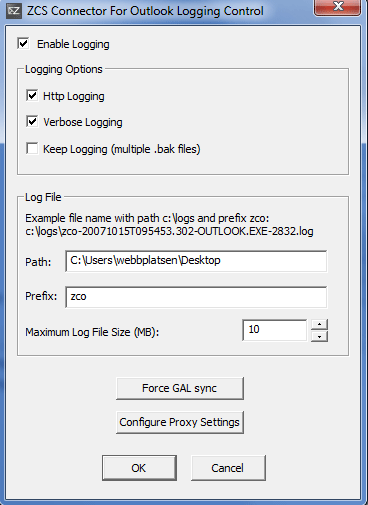
Send a file from your briefcase

  1. Go to the briefcase.
  2. Right-click the file you want to send > Send as attachment.
  3. The file is placed as an attachment to a message that is ready to be shipped.

How can I block a sender?

If there is a particular e-mail address that you want to block e-mails from you can fill in the e-mail address to your own private blacklist.
  1. Go to the Preferences tab > Mail.
  2. Scroll down the page until you get to the title “Options spam”.
  3. Add e-mail addresses here.
  4. Do not forget to click Save at the top left.


Working with attachments

Presentation of how you can work with attachments in your account.
  • E-mail may contain attached files in different formats. Some can be opened in the computer directly, while others require that any application installed on your computer to open the file, such as Word.
  • Messages that contain an attachment, a paper clip next to the subject.
  • Open an attached file by clicking on the file name to look at it directly.
    With the Download, you can choose which program you want to open the file or if you want to save the file on your hard drive. Select portfolio adds a copy of the file in the folder you choose. Then you can choose to delete the file, which is great because it is unnecessary to have it twice in his account.

Save the downloaded attachments to your computer

w2g-hamta


  1. Click Download in the e-mail > select Save File.
    The attached file is saved where your computer usually save downloaded files, eg in your Downloads folder or on your desktop (this can be set in your browser).
  2. Back to E-mail and click Remove.
  3. Select Yes to the question Do you want to remove this attachment permanently?
  4. The attachment is deleted.
If you want to get the file back again, you can do so by clicking Restore deleted items and search for file names.

Responding to e-mails with attachments

7_bilaga_svar_work2go

Someone has added an attachment to an e-mail message and you must answer it. If you wish to send a reply without that attachment, you do not do anything but fill in the reply message. But if you want to send back a response where the attachment’s still added, you put a tick in the box in front of the file.


Preferences for e-mails

Information about different settings that you can do to your e-mail in your account.

At Preferences > Mail there are several options for handling your messages in Work2Go.

Displaying Messages

  • Select how often you want to check for new emails.
  • If you want your messages to be displayed as HTML, if formatting such as bold type should be used or not.
  • Select if you want to display snippets of the message in the email list or only the subject.
  • If you want to display an email in a new window or in a new tab when double-clicking on it.
  • If images in HTML-formatted emails should be downloaded automatically.
  • Decide when an email should be marked as read.
  • Decide in which order emails should be marked next, after moving or deleting one.
  • If you only want to display certain emails when logging in to Work2Go you can set this at “Default Mail Search”. Type in:inbox to view all emails, is:unread if you only want to see unread emails, tag: the tag’s name to only display emails with that tag, in:the folder’s name to display emails in a specific folder. In case of a sub-folder you type in:inbox/the folder’s name. NOTE! If a label or folder contains several words, use quotes around the words, ie “Unread email”.

Receiving messages

  • Play a sound.
  • Highlight the Mail tab.
  • Flash the browser title.
  • Pop up message appears.
  • Forward a copy to another email address and select if copies should be kept.
  • Create an auto-reply message.
  • How incoming read receipts request should be handled.
  • How email you sent to yourself should be handled.

Composing Messages

  • Select how you want your text to be formatted. These settings applies while working in Mail, Calendar and Documents.
  • You can also choose if you want your text to be plain text by default.
  • Automatically save a draft of an email while you’re typing it.
  • Reply/Forward email in its original format. This is useful to make sure the recipient can get the message in the best format they can read.
  • Always write emails in a new window.
  • Spellcheck always before sending an email.
  • Keep a copy in your Sent folder.
  • If you want the original message to be included or not when you’re replying or forwarding a message.

Junk Mail Options

You can block or allow messages from a specific domain or email address.
NOTE! Spam are already handled by MailSafe, which is part of Work2Go.
This is only an option to use if you want to block someone specific yourself.

Access e-mails from other email clients

Choose whether all mail or just new to be retrieved when you add a POP3 account in Work2Go. If junk mail is retrieved and how incoming deleted messages are handled.

Strikethrough e-mails in Outlook

Can you see e-mails that are strikethrough in Outlook after you decided to delete them? Here we explain how you can change this.

You can change your account settings so that your e-mails will not only be marked for removal, but they end up in the trash instead.

  1. outlook_trashKlicka fliken Arkiv.
  2. Kontoinställningar > Kontoinställningar.
  3. Klicka på det IMAP-konto du vill ändra på fliken E-post och sedan Ändra > Fler inställningar.
  4. På fliken Borttaget väljer du Flytta borttagna objekt till följande mapp på servern och klickar sedan på Trash.

Click image for full version.

You can also connect your Outlook sent folder to Work2Go
This helps avoid duplicate folders on your account.
Click the tab Sent > Save sent items in the following folder on the server > Sent.

Send an image

Information about the different ways you can send a picture.

bifogaWhen you want to send an e-mail with a picture, you can either add the image as an attachment or set the image to be placed in the message itself.

  1. Create a new message.
  2. Click the arrow next to Attach in the message toolbar and find the image you want to send.

Several images in one message

If you want to add multiple images at once, select them at the same time. They then attached as files to your message.

View image in message

Do you want the image to be placed in the message, select Insert content when you click the arrow next to Insert. If the image is in your briefcase tick the box in front of Show images in message body.

Makes the image clickable

img_link

  1. Click on the picture in the message so that it is highlighted.
  2. Click Insert Hyperlink icon in the message toolbar.

Drag and drop from your computer

7_draslapp_bildYou can also attach a picture as an attachment by dragging and dropping it directly from your desktop to your message, and presto, it’s attached. What is important to keep in mind is that you have to drag the image file to the designated field. It does not work if you drag the image file into the message field.

Save images in a folder and post a link to the

If you want to send several pictures to someone or if it’s an images with high resolution, file size of up to 5 MB, it may be easier if you save the pictures in a folder in your portfolio instead. Share the folder and give out its link to the one you want to have access to the pictures. Even though you can send large emails, it is not certain that your recipient can receive them.

Moving e-mails between two accounts

You can move emails from one account to another by doing an export that you can then import into the other account.

export_epost

Go to the Preferences tab > Import / Export: Export.

  1. At Source click All Folders and select the folder of emails to be moved > OK.
  2. Export > Save File.
  3. Under the heading Import: Browse > find the exported file

Select multiple messages simultaneously

By marking multiple at the same time it will be easier and faster to manage your e-mail.

delad-etikett

Do not you see any marquee in front of your e-mail message as pictured to the right?

  1. Go to the Preferences tab > General: Other
  2. Settings: Always Show Selection boxes should be selected.
  3. Now you can click a check mark in the box. Hold down the Ctrl key to select multiple at the same time or the Shift key to click multiple consecutively. (Click the top with the Shift key and then the last while you still press down the Shift-key, and all between them will be selected at the same time.)

Move e-mails within an account

E-mails can be moved from your inbox and sorted into folders in different ways. Here we describe how.
  • flytta2Drag and drop the desired folder.
  • Select the message> press the M key> select folder.
  • Right-click the message> Move> the folder.
  • Click Move on the top toolbar> select the folder.

You can select multiple messages and move them at the same time, by putting a tick in the box in the list of all e-mails.
Use the keyboard key Shift + click to select multiple e-mail.

Move attachment from e-mail to your file archives

flytta-arkivClick on the briefcase at the top of the message window and select the folder to save the file.
You can also search for the folder or create a new folder.

NOTE! When you save an attached file to your briefcase, a copy of the fileis created. Delete the file in the e-mail so you save on your space on your account.

Spell Check

How you can use the spell checker on the account.

stavning3To check the spelling, click Check spelling symbol in e-mail message toolbar.

Misspelled words will be marked. If you click on the word, you get a drop-down menu of suggestions to choose from. You can also choose to Ignore the suggestions or Add the word you typed, even though the spell checker sees it as misspelled. The word will be highlighted again but this time in a different color.

stavning5NOTE! Before you close the spell checker, you can change back the corrected word to the original spelling. Click on the highlighted word again and select the original spelling from the top of the list.

stavning2When you are finished with the spell check, click Resume editing. To check the spelling again, you click Check again.

stavning6If you always want all your emails spell checked before sending them, you can activate “Mandatory spellcheck before sending a message” under Preferences > Mail > Composing: Composing Messages.