Archive | Preferences

How can I block a sender?

If there is a particular e-mail address that you want to block e-mails from you can fill in the e-mail address to your own private blacklist.
  1. Go to the Preferences tab > Mail.
  2. Scroll down the page until you get to the title “Options spam”.
  3. Add e-mail addresses here.
  4. Do not forget to click Save at the top left.


Working with attachments

Presentation of how you can work with attachments in your account.
  • E-mail may contain attached files in different formats. Some can be opened in the computer directly, while others require that any application installed on your computer to open the file, such as Word.
  • Messages that contain an attachment, a paper clip next to the subject.
  • Open an attached file by clicking on the file name to look at it directly.
    With the Download, you can choose which program you want to open the file or if you want to save the file on your hard drive. Select portfolio adds a copy of the file in the folder you choose. Then you can choose to delete the file, which is great because it is unnecessary to have it twice in his account.

Save the downloaded attachments to your computer

w2g-hamta


  1. Click Download in the e-mail > select Save File.
    The attached file is saved where your computer usually save downloaded files, eg in your Downloads folder or on your desktop (this can be set in your browser).
  2. Back to E-mail and click Remove.
  3. Select Yes to the question Do you want to remove this attachment permanently?
  4. The attachment is deleted.
If you want to get the file back again, you can do so by clicking Restore deleted items and search for file names.

Responding to e-mails with attachments

7_bilaga_svar_work2go

Someone has added an attachment to an e-mail message and you must answer it. If you wish to send a reply without that attachment, you do not do anything but fill in the reply message. But if you want to send back a response where the attachment’s still added, you put a tick in the box in front of the file.


Preferences for e-mails

Information about different settings that you can do to your e-mail in your account.

At Preferences > Mail there are several options for handling your messages in Work2Go.

Displaying Messages

  • Select how often you want to check for new emails.
  • If you want your messages to be displayed as HTML, if formatting such as bold type should be used or not.
  • Select if you want to display snippets of the message in the email list or only the subject.
  • If you want to display an email in a new window or in a new tab when double-clicking on it.
  • If images in HTML-formatted emails should be downloaded automatically.
  • Decide when an email should be marked as read.
  • Decide in which order emails should be marked next, after moving or deleting one.
  • If you only want to display certain emails when logging in to Work2Go you can set this at “Default Mail Search”. Type in:inbox to view all emails, is:unread if you only want to see unread emails, tag: the tag’s name to only display emails with that tag, in:the folder’s name to display emails in a specific folder. In case of a sub-folder you type in:inbox/the folder’s name. NOTE! If a label or folder contains several words, use quotes around the words, ie “Unread email”.

Receiving messages

  • Play a sound.
  • Highlight the Mail tab.
  • Flash the browser title.
  • Pop up message appears.
  • Forward a copy to another email address and select if copies should be kept.
  • Create an auto-reply message.
  • How incoming read receipts request should be handled.
  • How email you sent to yourself should be handled.

Composing Messages

  • Select how you want your text to be formatted. These settings applies while working in Mail, Calendar and Documents.
  • You can also choose if you want your text to be plain text by default.
  • Automatically save a draft of an email while you’re typing it.
  • Reply/Forward email in its original format. This is useful to make sure the recipient can get the message in the best format they can read.
  • Always write emails in a new window.
  • Spellcheck always before sending an email.
  • Keep a copy in your Sent folder.
  • If you want the original message to be included or not when you’re replying or forwarding a message.

Junk Mail Options

You can block or allow messages from a specific domain or email address.
NOTE! Spam are already handled by MailSafe, which is part of Work2Go.
This is only an option to use if you want to block someone specific yourself.

Access e-mails from other email clients

Choose whether all mail or just new to be retrieved when you add a POP3 account in Work2Go. If junk mail is retrieved and how incoming deleted messages are handled.

Select multiple messages simultaneously

By marking multiple at the same time it will be easier and faster to manage your e-mail.

delad-etikett

Do not you see any marquee in front of your e-mail message as pictured to the right?

  1. Go to the Preferences tab > General: Other
  2. Settings: Always Show Selection boxes should be selected.
  3. Now you can click a check mark in the box. Hold down the Ctrl key to select multiple at the same time or the Shift key to click multiple consecutively. (Click the top with the Shift key and then the last while you still press down the Shift-key, and all between them will be selected at the same time.)

Do not be disturbed every time you receive new e-mail

There are settings you can change, indicating how you find out that you have new email messages.

If you receive many e-mails in your inbox and are easily disturbed by the sound / blinking browser / message box is displayed for incoming messages, you should change the settings for receiving messages.

  1. Go to the Preferences tab> Mail > Receiving messages.
  2. Correct the settings for message arrival.
  3. Click Save in the upper left corner.

Make Work2Go to default e-mail program

How to set Work2Go to opened when you want to send e-mail from a web site or application.
In many programs and websites you can click a link to get information sent as an email message. You can set Work2Go as your default e-mail application, which means that if you eg click a link for sending information from a web page as an email message, a new message opens in your account in Work2Go with the address and the information already filled in for you.

Set default e-mail program in Firefox

mailto1_firefox1. Click the menu in the top right corner > Settings.
2. Go to the Programs and scroll the list until you come to mailto.
3. Click the arrow and select Use Work2Go > OK.

mail2_firefox2


How filters can be used to simplify your day

Using e-mail filters increases the efficiency of your work. Here we tell you how filters can help you to manage all your messages.

You can create filters based on a number of different rules to get your messages sorted in different folders and gain control of the information flow, which in turn gives you more time for other work.

You can easily have them active periodically by a click.

Filter for incoming messages

  • Sort messages into folders based on conditions such as email address, subject, size, date, content, attachments and Calendar invitation.
  • Use multiple conditions for one and the same filter.
  • Automatically tag messages with tags, a flag or as read.
  • Move incoming messages to a specific folder.
  • Forward a message to another address.
  • Discard a message. Which means that the message will not reach your mailbox at all.

Filter for outgoing messages

  • Sort outgoing messages from the sent folder to another specified folder.
  • Mark e-mails with a tag.
  • Forward outgoing messages to another e-mail address.

NOTE! After creating a filter you can run the filter through your inbox. The only thing you need to do is select the filter and then click Run filters.

Get less important e-mails moved from your inbox

You can set a filter to receive e-mails that are less important, such as newsletters and updates from social media, to be delivered to a separate folder instead of your inbox.

The folder Activity Stream is placed in your personal list of folders in the overview window to the left, so that you can easily go through its contents when you have spare time.

  1. aktivitetsstrom1Click the gear icon next to the title Folders and select Activity Stream.
  2. Put a checkmark in the box by Moving messages to activate the activity stream and then choose which messages you want to get moved automatically. Then click Save.

The following types of messages can be moved

  • Messages sent to a distribution list that you are a member of
  • Commercial mass mailing
  • Messages where your address is not in the To or in the To or Cc fields
  • Messages from people who are not in your address book

You can also tune these settings further if clicking Advanced Controls. Then you can get messages marked with a tag, already read, flagged or redirected to a different e-mail address.

Create filters to sort e-mails

Filter helps you to get control of your inbox and sort incoming and outgoing e-mails automatically for you.

filter

Go to the Preferences tab > Filters.

  1. Create a filter for incoming or outgoing e-mail by clicking on the appropriate tab.
  2. Click New filter and the Add Filters window opens.
  3. Give the filter a suitable name and tick the filter to be active.
  4. Set the conditions to suit the purpose of the filter.
  5. Don’t process additional filters should be checked. Click OK when finished.

One of – means that when one of these conditions is met, the action will be applied.
All – means that all conditions must be met for the action to be performed.
These steps can be repeated if the filter should include more conditions and actions.
Select the appropriate option from the drop down menu.

Creating a filter from an email

Right-click on a message or e-mail address and select New Filter / Add to Filter > New filter.

Example of how a filter can be created and used

For example if you want all messages from a particular e-mail address with a particular subject should be placed in a special folder, you can select the following settings.

  1. If all the following conditions are met:
  2. From – matches exactly enter the actual email address in the box.
  3. Click + to add another condition.
  4. Subject – contains enter the e-mails subject in the box.
  5. Perform the following actions: Save in folder (to find the right folder click Browse …)

Add other e-mail accounts in your Work2Go

You can add more e-mail accounts to your Work2Go and thus gather all your e-mail inboxes in one place.

7_skapa_ext_konto1

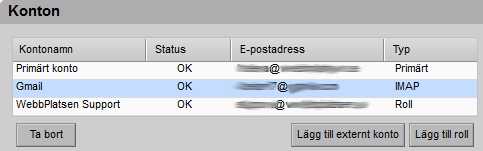
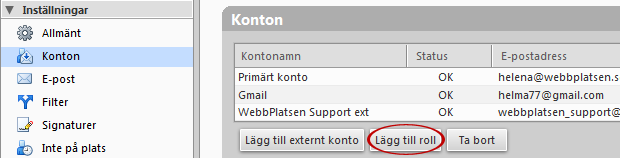
1. Preferences > Accounts.
2. Click Add external account and fill in the information under Settings for external account.

In this example, we added an account from gmail.com. If you want to add an account from another provider, you must have the correct settings to add an IMAP account from them first.

7_skapa_ext_konto2

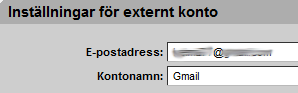
3. Fill in e-mail address and account name.

7_skapa_ext_konto3

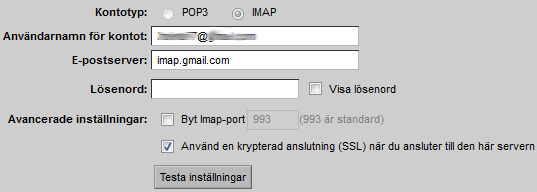
4. Select the account type IMAP and fill in the settings that you have received from your other email provider.
5. Click Test Settings to check that you entered the correct information.

7_skapa_ext_konto4

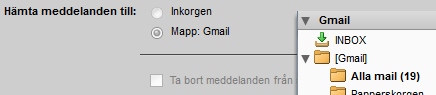
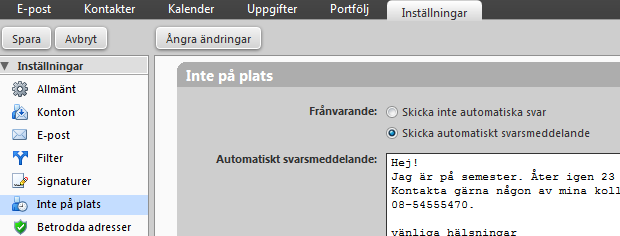
6. Decide where you want the messages sent to this email address should be saved.

ext_konto
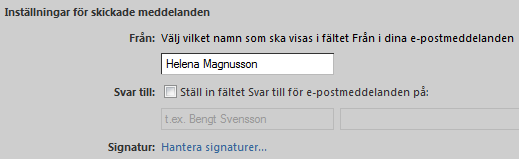
7. Enter your name and activate Reply to if you want to use this feature.

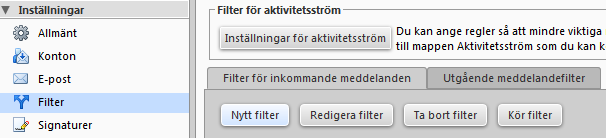
8. Click Manage signatures to add a signature.

9. Click Save in the top left corner when you are finished.
When sending e-mails from this account, select it in the dropdown menu at From when you type it.

Use different roles for different assignments

Here we explain how you can send e-mails from a different addresses even if you are still logged in to your own account.

roll

It’s useful to create different personas (roles) if you sometimes want to send business e-mails from your company (info@yourdomain.com) and at other times private e-mails from you (name@yourdomain.com).

  1. Go to Preferences > Accounts.
  2. Click Add Persona.
  3. Fill in your information under “Persona Settings”.
    Persona name, this is what you will see when you choose which persona you want to send your email from in the toolbar. You won’t see this name in the actual e-mail when you send it.
  4. Type in the name you want to appear in the “From” field of outgoing emails.
    Select what email address you want to send emails from.
    NOTE! E-mail address must be registered in Work2Go, either as an account or as an additional email address/alias.
  5. If you want the recipient to respond to another email address instead, tick the box next to “Reply-to” and select an email address from your list.
  6. Select a signature for the persona. If you haven’t already created one you can add it later. If you don’t want a signature added automatically, select “Do not attach signature”.
  7. Decide if you always want to select this persona automatically when replying e-mails  sent to the specified email address or when you get a response to a particular folder.
  8. Click Save at the top left corner when you are finished.

Create more e-mail addresses / aliases [ADMIN]

You can have an endless number of email addresses linked to your account as aliases. Log in as administrator and add them as aliases.

alias11. Login on your admin account.
All customers/domains have at least one administrator account and usually it’s the e-mail address admin@yourdomain.com

2. Click the arrow next to the account name in the top right corner to select the Admin Console and log into the admin interface (same login as the account that you are already logged in).

alias2

3. Click Manage in the left column and then Alias.

alias3

4. Click the gear in the top right corner > New.

5. Enter the new e-mail address you want to create, for example info@yourdomain.com and then the e-mail address of the account that messages should be directed to (eg your e-mail address) > OK.

Alias is useful to create if your name in your e-mail address have differrent but common spelling variations. For example, your name is John Johnston and your e-mail address is john.johnston@yourdomain.com, it could be useful to create following aliases jon.johnston@yourdomain.com, jon.jonston@yourdomain.com and john.jonston@yourdomain.com

Dynamic email aliases

Work2Go also gives you the possibility to create dynamic aliases. You can write “+text” after the first part of the e-mail address, eg “anna+important@yourdomain.com”. The message will then be sent to the inbox of “anna@yourdomain.com”. If you then have a filter containing “+important” such message will be moved to a particular folder when they are received.


Create a signature

A signature usually includes your name, contact details and other informative text. If you format it with HTML, you can also add pictures and link to a website.

You can create multiple signatures in your account. It can for instance be useful to create a more formal signature when you send e-mails to your customers and another for when you send to your friends.

When writing your message, select the signature to be used by clicking Options and Signature in the e-mail message toolbar. If you create multiple e-mail identities (roles), you can create a different signature to use for each different role.

skapa-signatur_w2g8

  1. Go to Preferences > Signatures and click New signature.
  2. Give the signature a descriptive name (especially important when you create multiple signatures).
  3. Select Format as HTML.
    (Format as plain text means that you can just fill in the text, no sign, image, etc.).
  4. Then create the actual signature in the box below.
  5. To add a logo put the cursor where it should be and click Insert image (icon with a picture of a tree). Click Browse to pick the image file from your computer.
  6. Select the signature to be used automatically when you write new messages or / and respond / forward from a particular sender / role.
  7. Determine whether the signature should be placed above or below the included messages.
  8. Click Save at the top left corner when you finish.

Create a signature from an HTML file

  1. Go to Preferences > Signatures and click New signature > Format as HTML.
  2. Open your HTML file in a browser.
  3. Select the text and copy.
  4. Paste it in the box for signature in Work2Go.
  5. Make any corrections.
  6. Place the cursor where the image should be and click on Insert image (icon with a picture of a tree) Click Browse to pick the image file from your computer.
    NOTE! If the HTML code for the image came with when you copied from the HTML file, you will see a broken link when you click on the icon to insert the image. Erase box and add the image file again.
  7. Click Save in the upper left corner.

Create an auto reply message

Here we show you how to create an auto reply message.

franvaromeddelande

Auto reply messages can be practical to use even when you’re at the office. You might have a lot to do, a tight deadline or something else when you simply don’t have time to take care of e-mail in a few days. Create a reply message saying you have received their message but your reply may take some time. Anyone who sends you a message will get a confirmation that you received the message directly and thus become less impatient with getting answers from you.

To create an auto reply message, go to Preferences > out of office.

  1. Click Send auto-reply message when you want to activate and/or create one.
  2. Enter the message in the auto-reply message box.
  3. Specify time period.
  4. Check the box Show free/busy in your calendar and choose between Out of office or Busy to be shown in your calendar during this period. By default only one away message will be sent per incoming sender/e-mail address during a seven days period. Contact us if you want it to be sent out more often.

Out of office messages

Here we show you how to create an out of office message.
You can have two different ones activated at the same time.

franvaromeddelande

To create an out of office message go to Preferences > out of office.

  1. Click Send auto-reply message when you want to activate and/or create one.
  2. Enter the message in the auto-reply message box.
  3. Specify time period.
  4. Check the box Show free/busy in your calendar and choose between Out of office or Busy to be shown in your calendar during this period. By default only one away message will be sent per incoming sender/e-mail address during a seven days period. Contact us if you want it to be sent out more often.

Send different reply messages at the same time

You can send two different kind of response messages at the same time.
One to your colleagues (and possibly also those saved in your address book) in the top box and another perhaps more formally in the second box. To activate the second message select the box by External Senders and choose who you want to send this message to.

  • Everyone who writes to you outside your workplace, from an e-mail address with a domain other than the one you use.
  • Select Anyone outside my domain except those in my contacts, if you want to send the more personal message to all your contacts and your colleagues, and the more formal message to external senders, the message in the box below.