Archive | Write and read

Always display images from certain senders

Read this if you want to avoid clicking to see images in emails you receive.

bild_i_mejl1

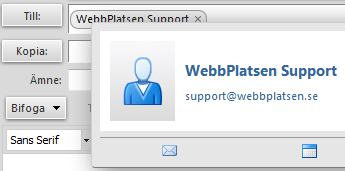
Click at the top of the message and click on the sender in the yellow bar to once and for all accept viewing all images in future messages from that particular sender.

  • If you click on the domain you accept images from any e-mail addresses with the domain, for example, both info@domän.se, market@domän.se etc.
  • If you click on the specific e-mail address, for example info@domän.se pictures will always appear automatically when you receive emails from info@domän.se, but when you get emails from market@domän.se the images were hidden and you must agree to display them to see them.

Creating a list of trusted senders

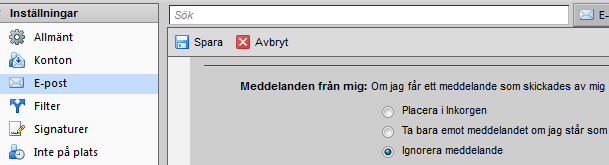
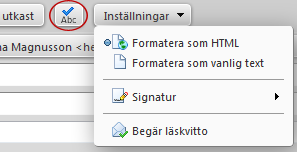
You can also create a list of trusted addresses / domains on the Preferences tab.

  1. Go to the Preferences tab > Trusted addresses
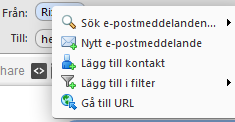
  2. Fill in the e-mail address or domain that you trust and that you always want to see pictures from.
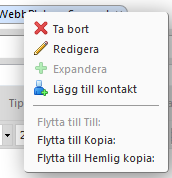
  3. Click Add and then Save in the upper left corner.

The reason why Work2Go don’t show images in e-mails without your consent is that it is relatively easy to hide a virus in an image file. Therefore, be careful and only approve those senders that you really trust.

When should I use conversation view?

visa

E-mails can be displayed in a variety of ways. View by conversations are useful when:

  • You read the e-mail less frequently and therefore have more messages to show at a time.
  • You have many messages with discussions that are sent back and forth.
  • You need to see who has responded Who in a context.


Redirect e-mails

You can forward emails so that it does not look like it has ever been in your inbox. This is how.

omdirigeraYou can forward e-mail messages that you have received to another address, so that it looks like it has been sent directly from the original author. The difference between the redirect instead of forward messages is that if you redirect it and it makes it easier for the recipient to respond to the original sender.

  1. Right-click the message and select Redirect.
  2. In the text box, enter the recipient’s address.
  3. Click OK.

Read receipt

When you receive a message

kvittoThe general settings that can be done in Work2Go applies only how to handle incoming requests, we recommend using the “Ask Me” so you per message can choose if you want to send out an read receipt or not. Settings > E-mail: Receipt of notice

When you send a message

7_kvittoTo request a read receipt on messages sent from yourself, choose this option per message, instead of changing the general settings in case you want or do not want to request a read receipt on all sent messages.


Send email later – scheduling

What to do if you want to write a message now, but have it sent automatically at a later time.

send_later

  1. Write your message and fill in the recipient’s e-mail address.
  2. Click the arrow next to Send on the toolbar.
  3. Select Send later.
  4. Set the desired date and time when you want the message to be sent.
  5. Click OK to save.
  6. E-mail is saved in the Drafts folder until it is sent.

Send to a mail group without getting your own copy

If your business has any employees’ e-mail addresses collected in a list such as name staff@yourdomain.com and you want to send a mail to all of your colleagues, but think it is unnecessary that the message also will reach your inbox, you can do a setting on your account that prevents this. The message will of course be sent to all the others that are on the list.

mailgrupp-till-mig

  1. Go to the Preferences tab.
  2. Click Mail in the left column.
  3. Scroll pretty far down on the page until you get to the headline Receiving messages.
  4. The section at the bottom of this box Messages from me.
  5. Here you select the Ignore message.
  6. Then click Save in the top left corner.

E-mail addresses are displayed as names in bubbles

Name in the address field appears in a bubble instead of a text in which the entire e-mail address is visible. Here we tell you more about what it means and its benefits.

Bubbles are more interactive and can be moved by drag and drop and edited by right-clicking on them. The feature is enabled by default, but can be changed back to normal text on Preferences > General > Other: Bubbles.

See more details about the person in the bubble

bubblor8_1

Keep your cursor over a bubble and the person’s name, e-mail address and any other contact details and a picture will be visible, but also quick links to write a new message or schedule an appointment with the contact.

Right-click a bubble when you read e-mail

bubblor8_2

When a menu appears from where you can search for more messages from / to the person in the bubble, write a new, add the contact to your address book, add the address in a filter or visit the address of the website.

Right-click a bubble when sending e-mail

Bubblor8_3

When a menu appears from where you can save / edit the contact in your address or move it to a different address field.


Drag and drop bubbles to move contacts

bubblor8_4

You can move one or more bubbles by drag and drop.
To select multiple bubbles at once, try using the Selection tool “rubber band”. Left click the white space in the field and drag a box over selected bubbles. The selected bubbles are now highlighted in blue and can now be dragged and dropped simultaneously.

Remove a contact from the proposed ones

Here we explain how you can remove the suggested contacts that you no longer want when sending e-mail.

When writing a message and fill in the recipient’s e-mail address you only need to enter the beginning of the address. Work2Go show automatically a list of e-mail addresses you have sent e-mails to earlier or saved in your address book.

If you have a contact with multiple e-mail addresses, which you use both, the adress you use more often are always at the top of the list. This ensures that you continually get the most use the address only for efficient use of your Work2Go.

foreget-address

But this also means that invalid addresses can appear in this list. You might, for example misstyped one once and tried to send mail to it which then bounced. Also this addresses is saved. But you can do something about this, you can hide it from the list and thus avoid taking the wrong one again. The only thing you need to do is click on the right ‘Forget’ next to the address.


Send to multiple contacts in an address book

If you send e-mail to multiple contacts at the same time we recommend following steps.
  1. Check your settings for e-mail addresses, you should not use addresses as bubbles now.
    Preferences > General > Other
  2. Remove the check mark that are in the box in front of Show email addresses in bubbles > Save.
  3. Open the Address Book and choose the ones you want to send to. Select multiple contacts with Ctrl + click or Shift + click to select as a serie.
  4. Right-click one of the selected contacts > New e-mail message.
  5. Select all the contacts that have now fallen into the To box, right-click > Cut.
  6. Click Show Bcc and put the cursor in the Bcc box, right-click > Paste.
  7. Enter the e-mail address in the To box because some mail servers do not accept empty To field.
  8. Send.

Choose a signature when you send e-mails

signatur_w2g8

You can create multiple signatures on the Preferences tab. One of them becomes your normal signature that shows up automatically in your message when you write a new one.

If you would rather use another of your signature when you send a message, go to Options in the message > select Signature.

Send from another persona

Would you like the message to appears coming from a different role than your private, for example from you in the role of answering economic questions, you can create a persona and maybe even a separate signature for.

Send a file from your briefcase

  1. Go to the briefcase.
  2. Right-click the file you want to send > Send as attachment.
  3. The file is placed as an attachment to a message that is ready to be shipped.

Send an image

Information about the different ways you can send a picture.

bifogaWhen you want to send an e-mail with a picture, you can either add the image as an attachment or set the image to be placed in the message itself.

  1. Create a new message.
  2. Click the arrow next to Attach in the message toolbar and find the image you want to send.

Several images in one message

If you want to add multiple images at once, select them at the same time. They then attached as files to your message.

View image in message

Do you want the image to be placed in the message, select Insert content when you click the arrow next to Insert. If the image is in your briefcase tick the box in front of Show images in message body.

Makes the image clickable

img_link

  1. Click on the picture in the message so that it is highlighted.
  2. Click Insert Hyperlink icon in the message toolbar.

Drag and drop from your computer

7_draslapp_bildYou can also attach a picture as an attachment by dragging and dropping it directly from your desktop to your message, and presto, it’s attached. What is important to keep in mind is that you have to drag the image file to the designated field. It does not work if you drag the image file into the message field.

Save images in a folder and post a link to the

If you want to send several pictures to someone or if it’s an images with high resolution, file size of up to 5 MB, it may be easier if you save the pictures in a folder in your portfolio instead. Share the folder and give out its link to the one you want to have access to the pictures. Even though you can send large emails, it is not certain that your recipient can receive them.

Spell Check

How you can use the spell checker on the account.

stavning3To check the spelling, click Check spelling symbol in e-mail message toolbar.

Misspelled words will be marked. If you click on the word, you get a drop-down menu of suggestions to choose from. You can also choose to Ignore the suggestions or Add the word you typed, even though the spell checker sees it as misspelled. The word will be highlighted again but this time in a different color.

stavning5NOTE! Before you close the spell checker, you can change back the corrected word to the original spelling. Click on the highlighted word again and select the original spelling from the top of the list.

stavning2When you are finished with the spell check, click Resume editing. To check the spelling again, you click Check again.

stavning6If you always want all your emails spell checked before sending them, you can activate “Mandatory spellcheck before sending a message” under Preferences > Mail > Composing: Composing Messages.

Create a new e-mail message

Learn about the features you can use when creating new e-mails.

skrivaw2g8

Click New message.

Who would you like to send from?

fran_w2g8

If you have multiple e-mail addresses (roles) on your account, select the role you want to send your message from.

Who do you want to send?

7_gal_addrPlease enter the e-mail address of the / those you want to write to in the To or Cc-field.
You can either type the address yourself or tap To to search through your address books. If the address is already saved in Work2Go you will get a list of hit results that match what you type and you won’t need to enter the entire address yourself but just choose the right one from the list.

If you want to send a blind copy to someone and do not see the field, click Show Bcc right of the Cc field.

Write the message and attach a file

7_amne_prio

Write an appropriate subject for the message and select a priority if needed.

bifogaClick the arrow next to Attach to send one or more files. You can attach files saved in your computer or briefcase in Work2Go. If it’s an image, you can choose whether you want the image to be visible in the message itself or whether it should only be attached as a file. You can also attach another e-mail message from your mailbox or a contact from your address book.

Type your message and correct the formatting if needed.

Check spelling and other settings

stavning_w2g8To check the spelling in the message, click the ABC button at the top.

To get a read receipt when the recipient opens your message, click the arrow at the top Options > Request read recipt.

To change the signature, click the arrow at the top Options > Signature.

Send now or later?

7_skickaIf you don’t want to send the message immediately you can save it and send it at a later time, click Save draft.

To schedule when it should be sent instead, click the arrow at the Send > Send later and the message will automatically be sent along the time you specify.

Do you want to send your e-mail now, just click Send.


5 to consider before you send

  • Read through the message before you send it.
  • If anything needs fixing, specify what in the subject line.
  • Write short and concise.
  • Include people who need to be informed on the Cc line.
  • Include people who you need to respond to or act on the To line.